Prerequisites
You must complete lab 1 before completing these setup instructions.
Getting Java Libraries
Start by using git pull skeleton master from your repository. If you do this right, you should see a lab2setup folder appear in your repository directory.
Next, let’s download the Java libraries that you’ll need to complete future assignments (including this one).
- First, open up a terminal window and
cdinto yoursp21-s**repository. - Run
git submodule update --initYou should get output like this:
Submodule 'library-sp21' (https://github.com/Berkeley-CS61B/library-sp21) registered for path './' Cloning into '/Users/Connor/Downloads/sp21-s1/library-sp21'... Submodule path './': checked out '1fbc26d69f044b48346849989aeeff9761b00abf' - Ta-da! You now have libraries!
$ ls library-sp21/
javalib/
Below is shown the directory structure of
library-sp21. Look inside the folder and make sure you see exactly the files below. If you’re using your operating system’s file explorer the ‘jar’ part might not show up in the filenames, and that’s OK.library-fa21/ └── javalib ├── 61b_checks.xml ├── CS61B ├── algs4.jar ├── hamcrest-core-1.3.jar ├── jh61b.jar ├── junit-4.12.jar ├── masterpom.xml ├── org ├── stdlib-package.jar ├── stdlib.jar ├── ucb.jar └── xchart-3.5.1.jar
pom.xml
For all future assignments, instead of importing the entire folder like we did for lab1 and proj0, we’ll be importing a file called pom.xml.
The reason is that the pom.xml tells IntelliJ where to find the library for 61B. It is also possible to manually specify where the libraries are, but this process is a bit cumbersome (see the lab2setup directions from fa20 if you’re curious).
One-Time Setup
First, we will have to do one tiny tidbit of setup to make sure your system is ready to start using pom.xml files to import projects.
First, open up IntelliJ. Make sure you are on the home screen, as depicted below. If you are currently in an open IntelliJ project, you can go back to the home screen by navigating to File > Close Project.
Now that you are on the home screen, open up IntelliJ’s preferences with by selecting IntelliJ IDEA | Preferences for macOS (Shortcut: ⌘,) or File | Settings for Windows and Linux.
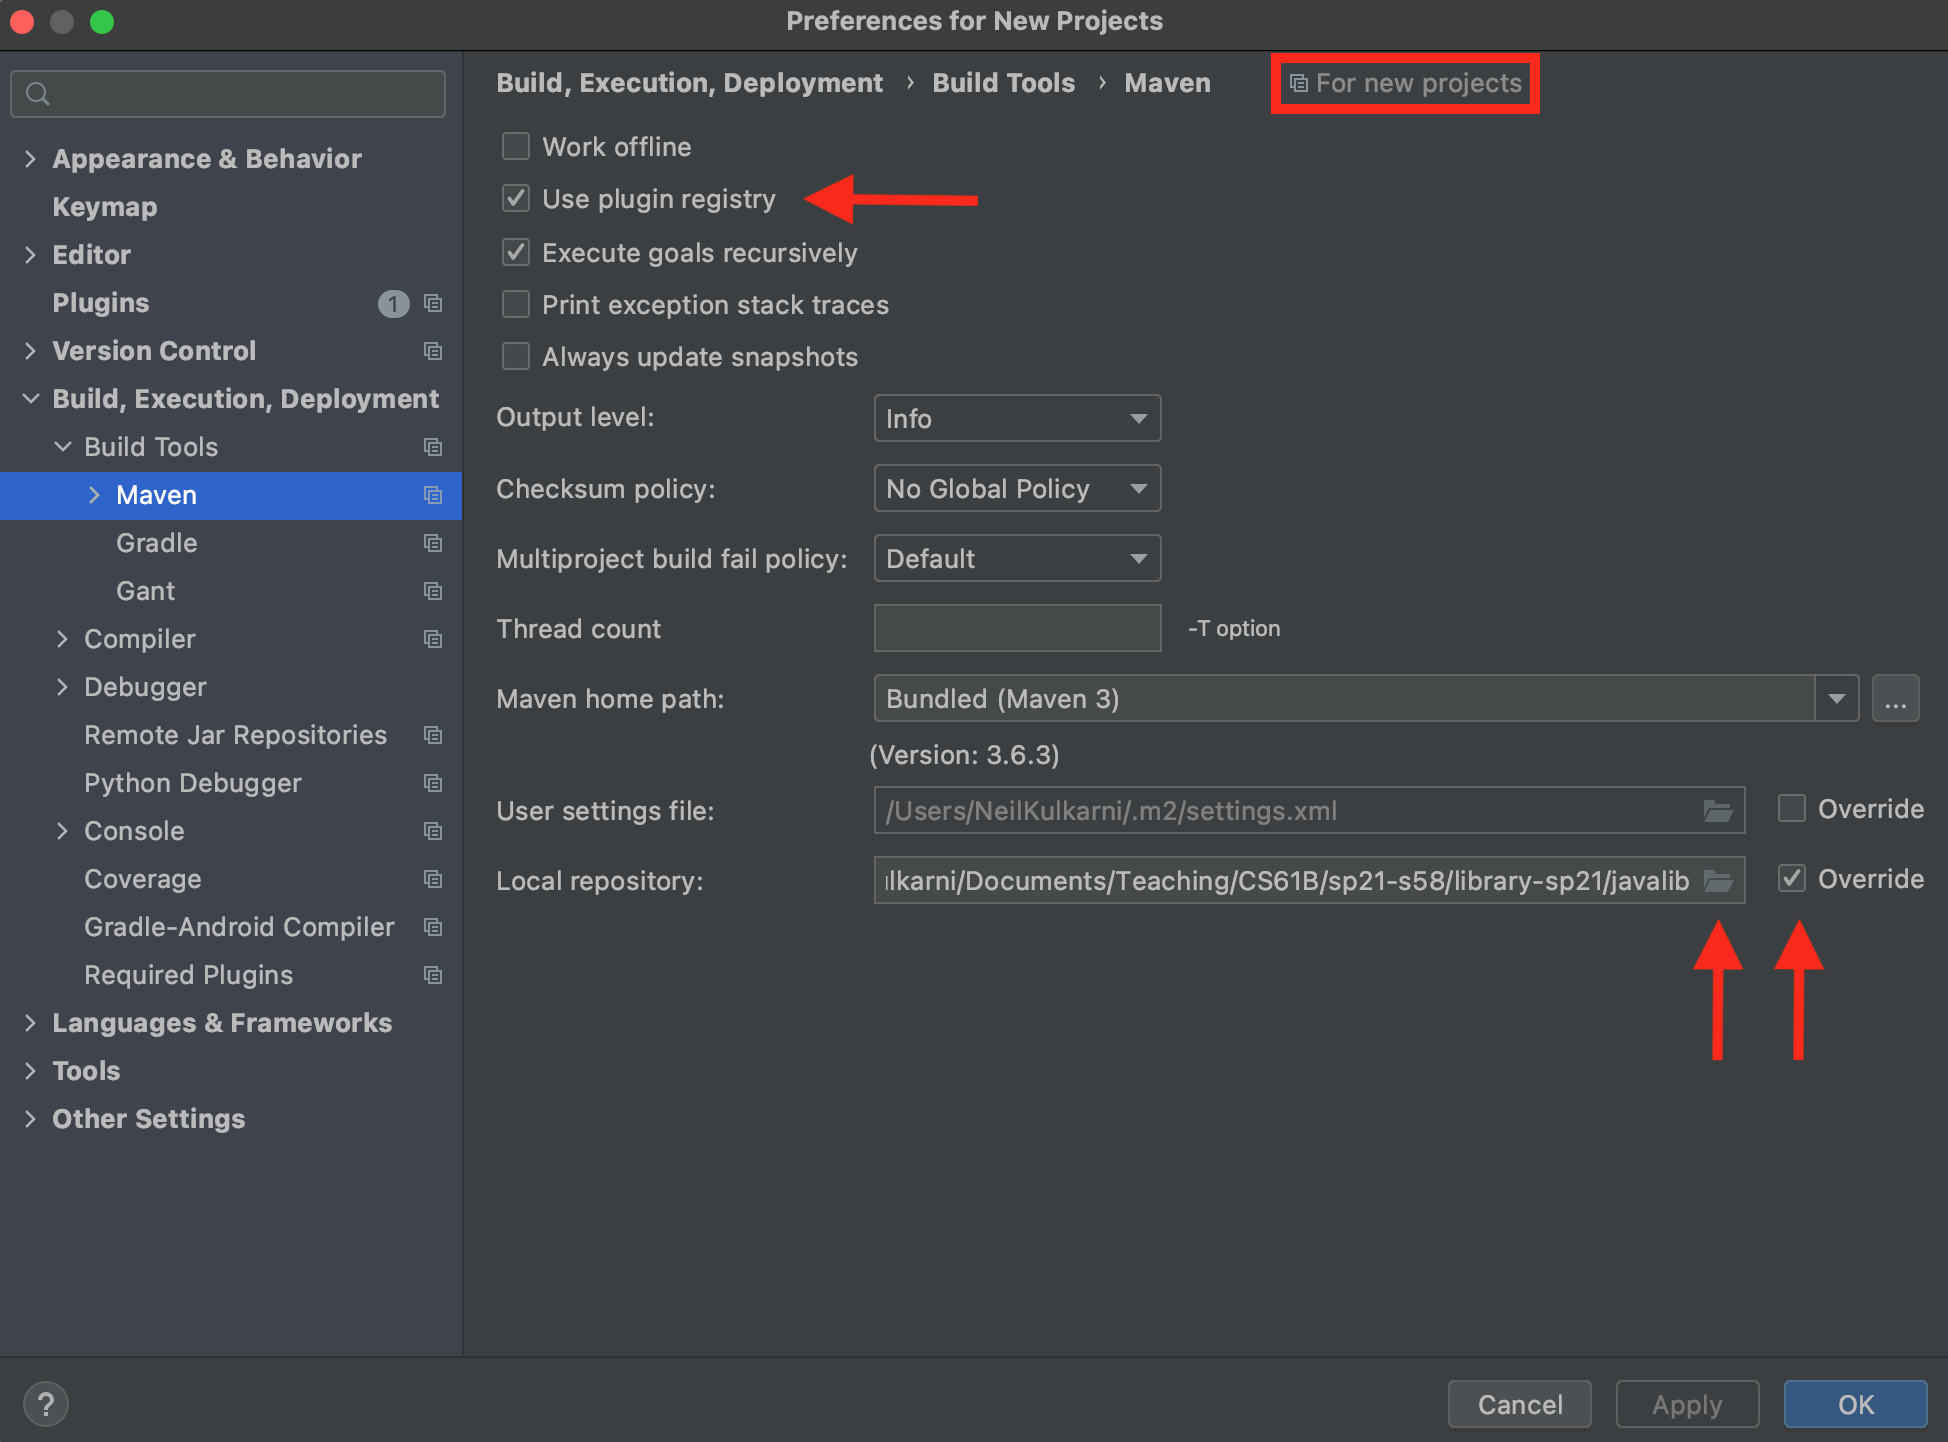
Navigate to Build, Execution, Deployment > Build Tools > Maven. You should see a screen like the following.
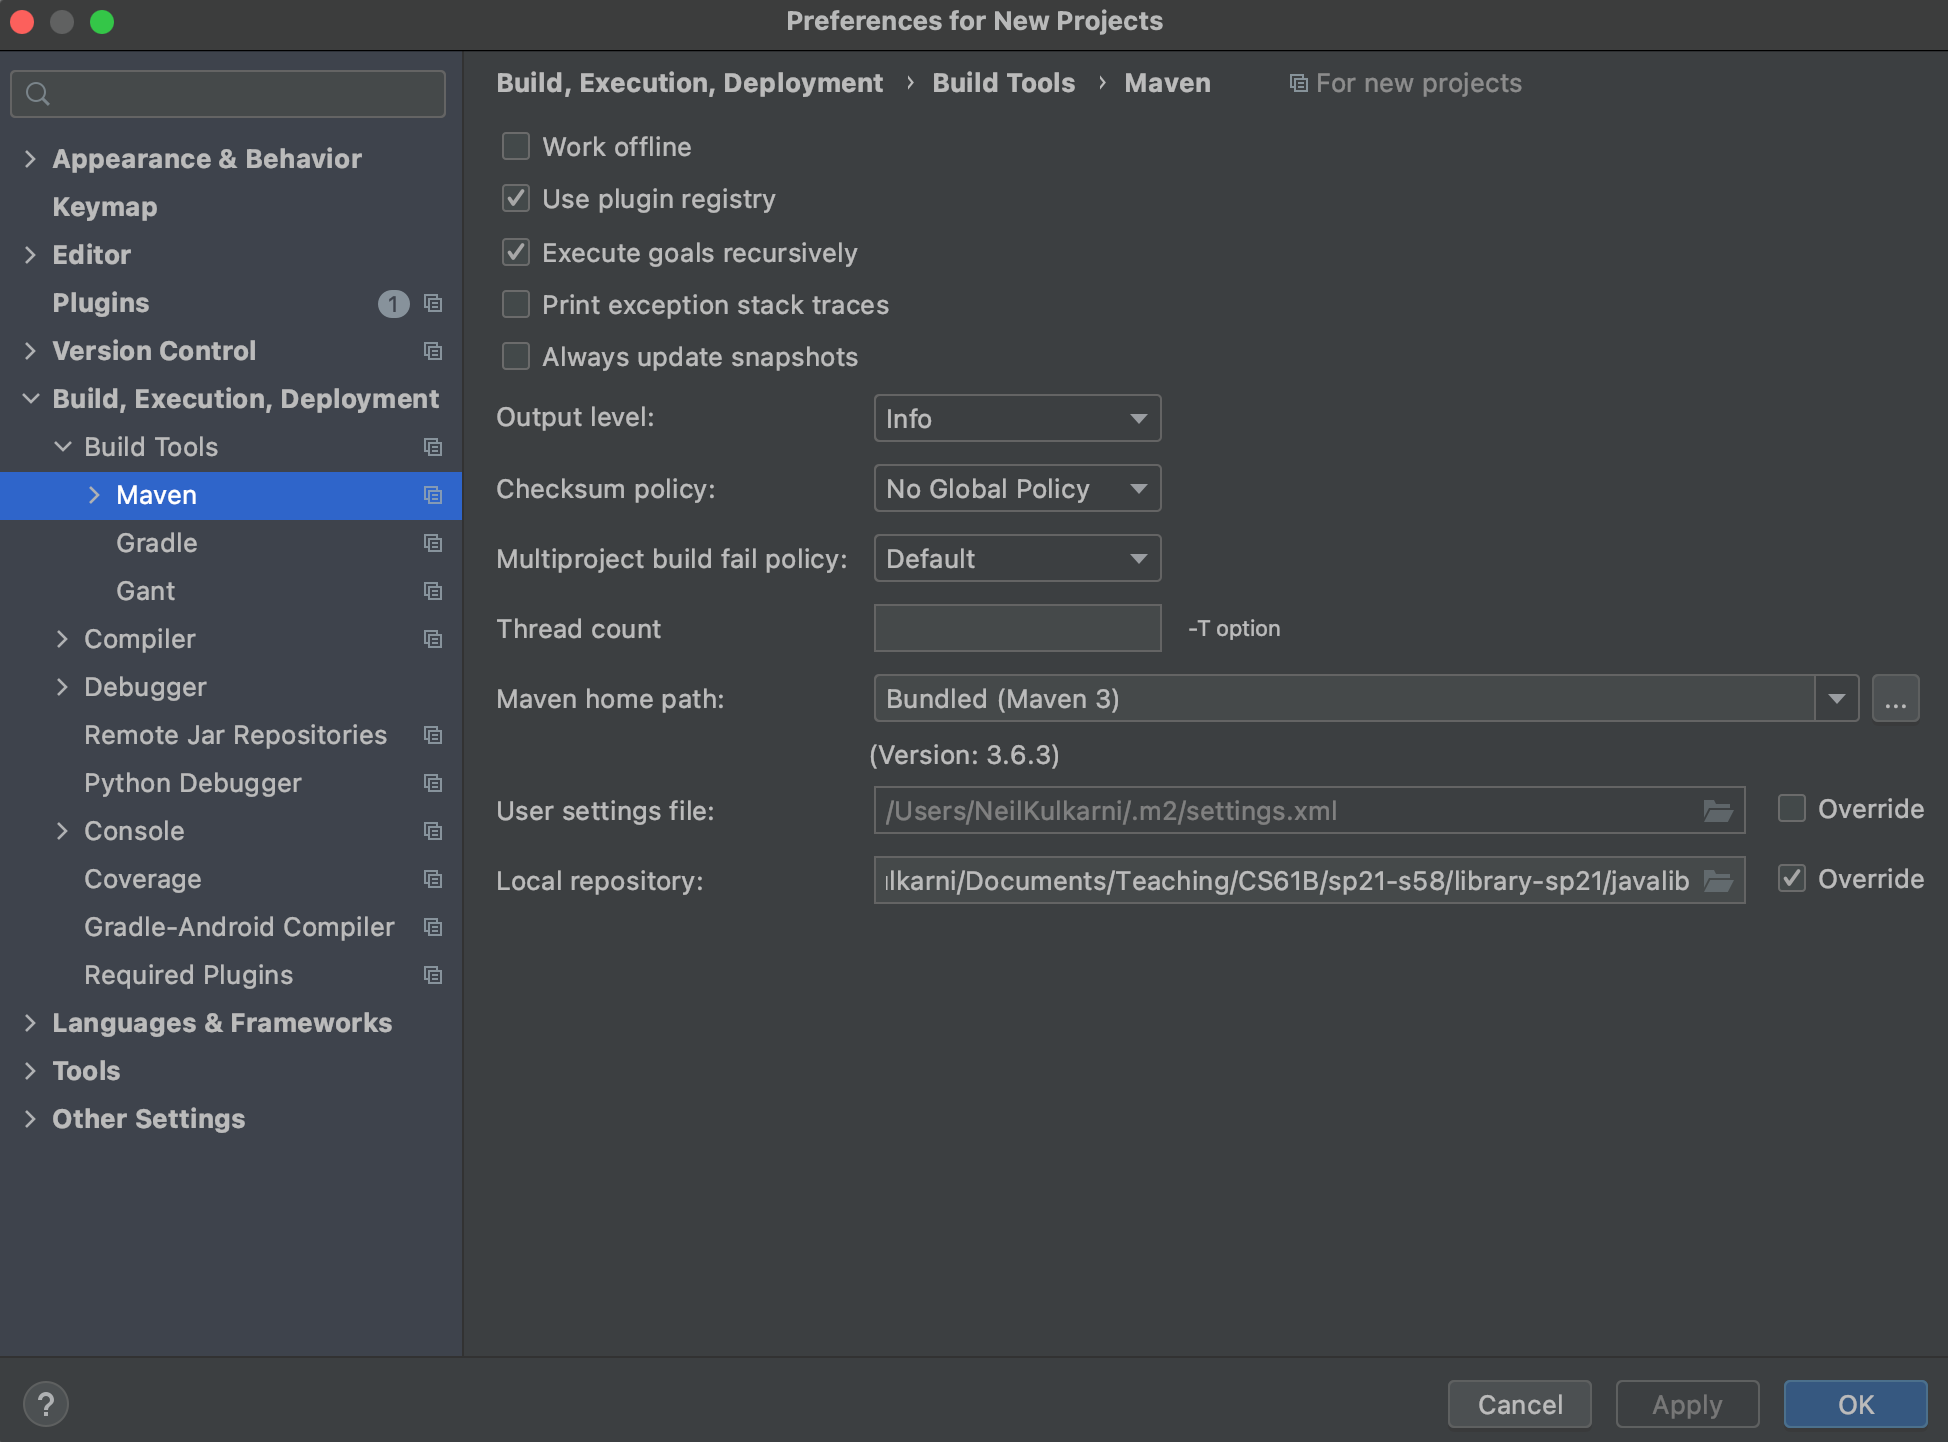
Make sure that it says “For new projects” in the top right corner. Update the following settings:
- Check the “Use plugin registry” button
- At the bottom, check the override button on the “Local repository” row
- Update the “Local Repository” path to
javalibin yoursp21-s***/library-sp21folder. You can do this by clicking on the folder icon and navigating through your file system OR bycding intosp21-s***/library-sp21/javalib, typingpwd, and copying that path into the text box. For example, my path is/Users/NeilKulkarni/Documents/Teaching/CS61B/sp21-s58/library-sp21/javalib - Make sure to hit “Apply” then “OK” to save your changes
Importing Projects with pom.xml
Once the one-time setup instructions are complete, opening a project with Maven is easy! Open up IntelliJ, and make sure you are on the home screen. If you are currently in an open IntelliJ project, you can go back to the home screen by navigating to File > Close Project.
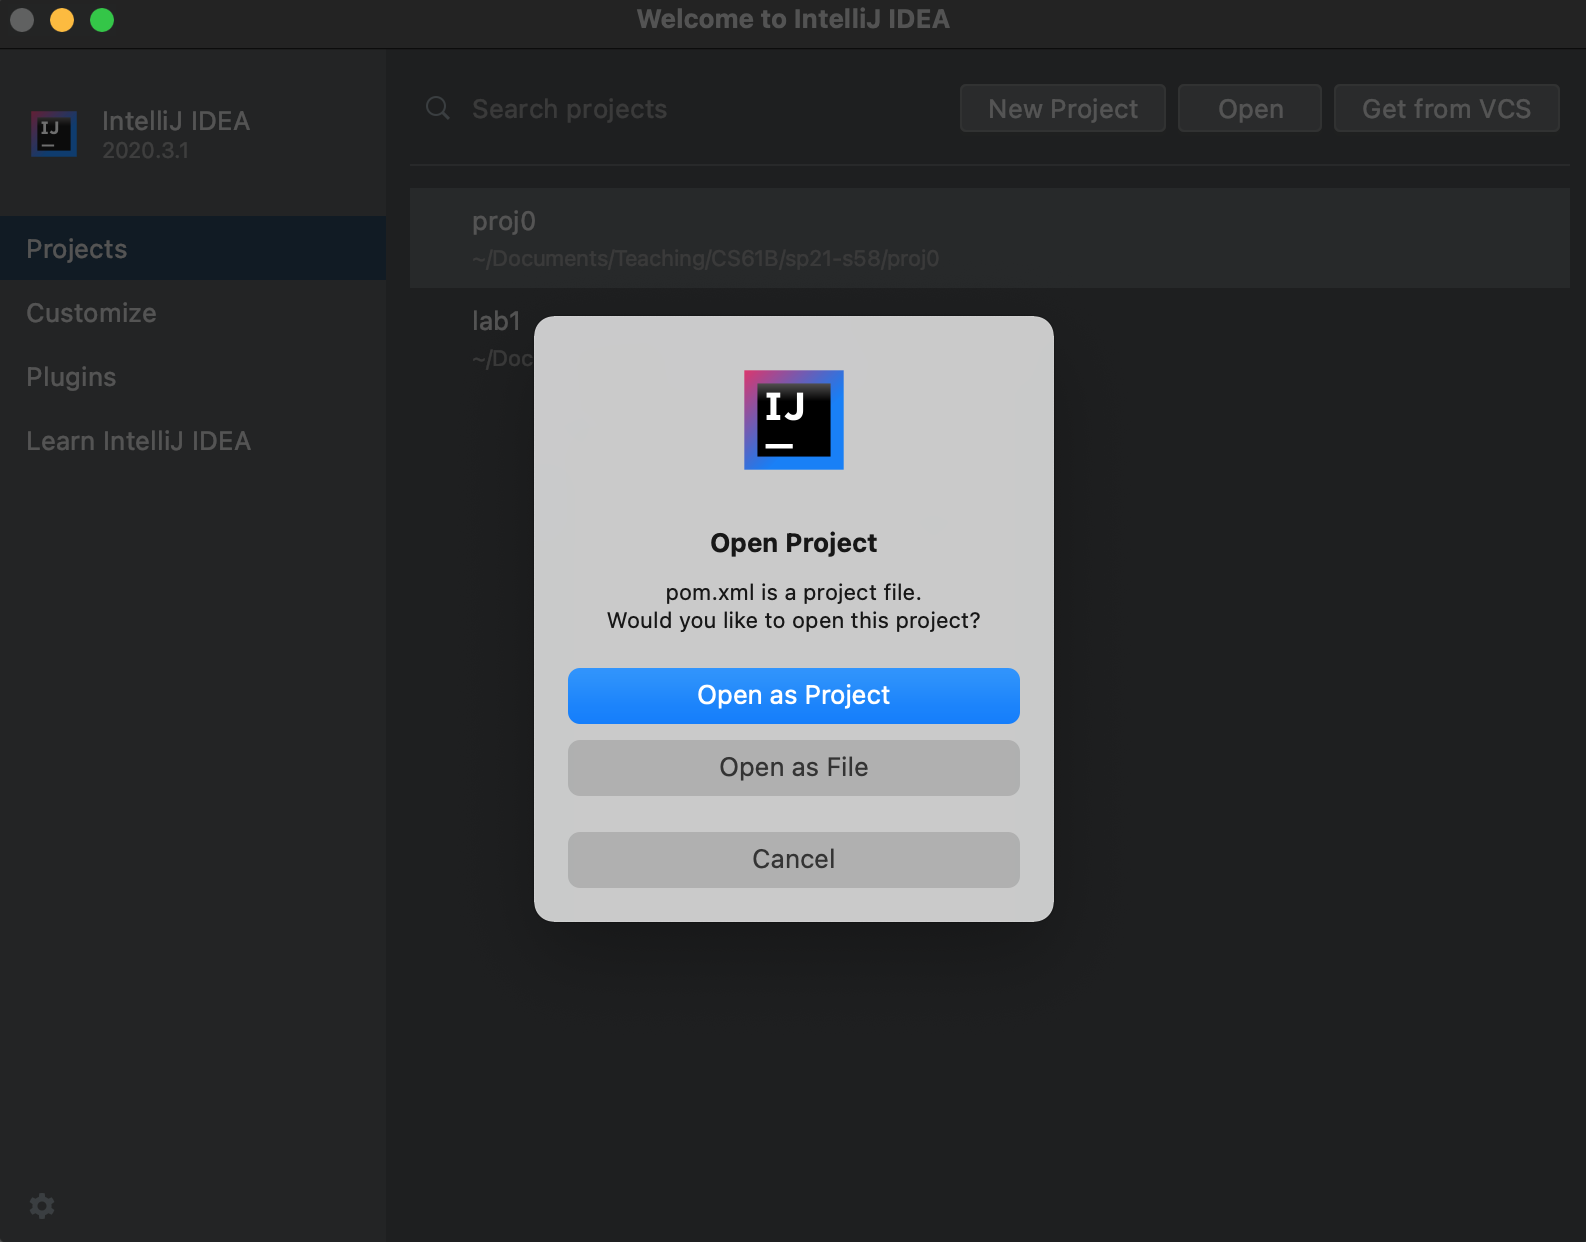
Now, click “Open” and navigate through your file system to the project you want to open (e.g. lab2setup). Open the pom.xml file inside that directory. You might get a popup window at this point that is similar to the one in the image below. Make sure to choose “Open as Project”. Once you do this, Maven will automatically import all the dependencies for you, and you’re ready to go!
Verifying Your Setup
Open the lab2setup project as described in the “Importing Projects with pom.xml” section. Try opening up DogTest.java in the lab2setup folder. This file uses the JUnit library, as indicated by the import statements at the top of the file. If @Test or assertEquals statements appear in red, this means something went wrong when you were downloading the libraries. Make sure to ask your GSI before proceeding.
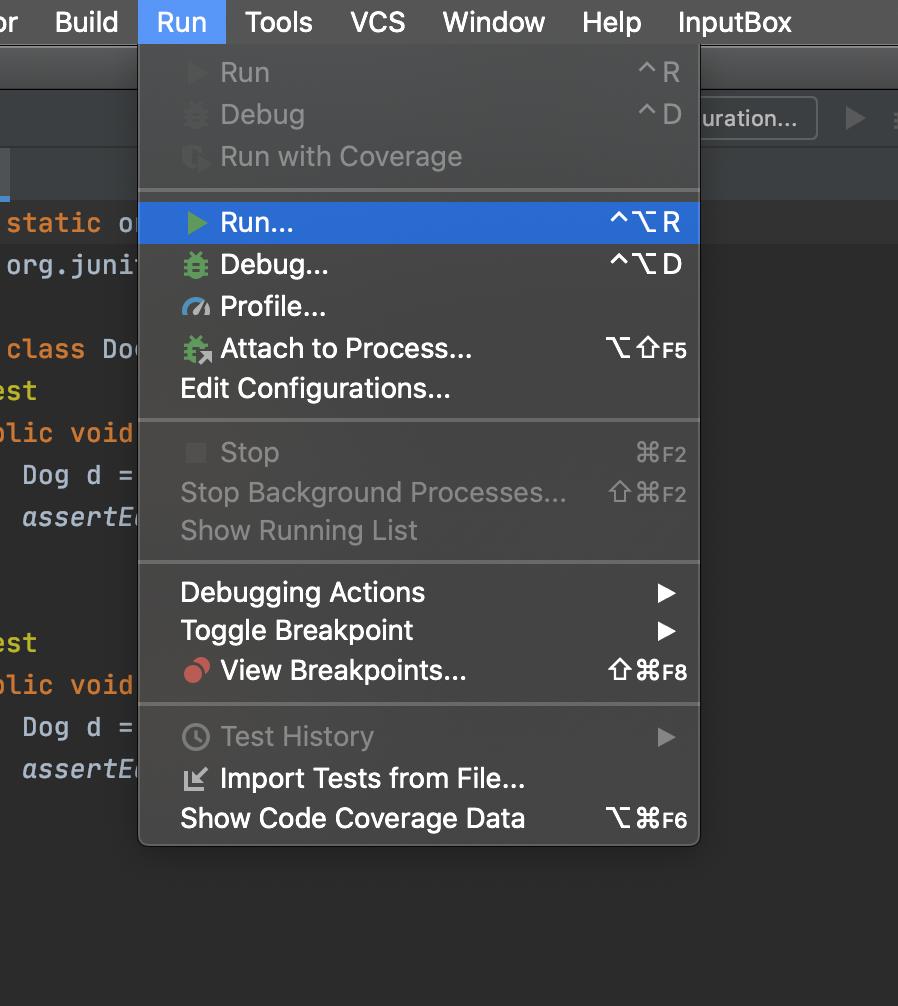
Next, try running the code by clicking “Run” → “Run…“, as shown below.
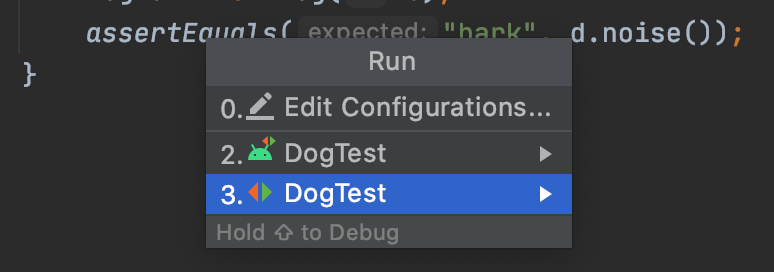
This will probably pop up a very small dialog window like the one shown. Basically IntelliJ is saying that it isn’t quite sure what you mean by running the program and is giving you three choices (yours may look slightly different).
- Option 0 is to edit the configuration before running the program (which we won’t do).
- Option 2 is to run the tests in the DogTest class.
- Option 3 is ALSO to run the tests in the DogTest class.
Click on either of the DogTest options and a green bar should appear with the message “Tests passed: 2 of 2 tests” as shown below.

You’ll notice after running your code that the green play and green bug icons in the upper right are now green; this is because when you clicked “2.”, IntelliJ memorized what you meant by Run for this project and you can now click this button to run your program. You’ll learn more about this over time as we use more advanced features of IntelliJ.
In case you’re curious why there were two DogTest icons above, it’s because one
of them runs the tests as if it is designed for the Android operating system (the little alien)
and the other (red and green triangles) runs the test as if it is just plain old Java. For the purposes of 61B,
these two choices will always do the exact same thing, so either one is fine.
You’re now ready to move on to lab2.